Interior PPF Installation Guide: Protect Your Dashboard & Center Console
What Are Interior Paint Protection Films (PPF)?
Interior Paint Protection Films, often called Interior PPF or Interior Protection, are transparent, self-adhesive Films designed to protect your car’s interior surfaces - such as the dashboard, center console, screens, and trim pieces - from scratches, fingerprints, UV damage, and daily wear.
Just like Exterior PPF protects your paint, Interior PPF acts as a sacrificial layer inside your car. Once applied, it’s practically invisible, yet it keeps glossy piano-black surfaces, touchscreens, and trims looking brand new for years.
You can also use matte or colored Films to customize the look of your cockpit.
What Are They Used For?
Interior PPF is commonly applied to:
- Center consoles – prevents scratches from keys, rings, and phone cases
- Roof consoles – protects overhead trim from wear
- Touchscreens & displays – shields against fingerprints and micro-scratches
- Dashboard trims – protects from scratches, UV fading and chemical cleaners
- Glossy surfaces – eliminates swirl marks and hazing from daily use
If you’ve ever noticed how easily a black piano-finish surface gets scratched or dusty - that’s exactly what Interior PPF is made to prevent.


Why Use Interior PPF?
Because it keeps your car looking brand new, even after years of use.
- Invisible protection: doesn’t alter the look or feel of your interior
- Easy to clean: fingerprints either don’t appear or wipe off effortlessly
- Heat & UV resistant: prevents fading or cracking of trim pieces
- Preserves resale value: your interior stays flawless - something buyers instantly notice
It’s a small upgrade that makes a big difference — especially for cars with touchscreens and glossy consoles like BMW, Mercedes, Audi, or Porsche.
How to Order Pre-Cut Interior PPF Kits
We already have Dashboard and Center Console PPF Kits for almost every car on the market - from A like Audi to Z like Zeekr and many more.
Not all of them are listed in our webshop, but ordering is easy:
- 💬 Contact us via Live Chat on our website
- 🔗 Send us the link to your car model from our store
- 🎨 Tell us which PPF Type you’d like (Brand & Gloss or Matte)
We’ll prepare and send you a high-quality preview of your kit so you can make sure everything fits perfectly before ordering.


Installation of Interior PPF
What You Need
- Spray bottle with slip solution (water + few drops of baby shampoo or dish soap)

-
Squeegee (included with every order from us)


-
Microfiber cloth

- Optional: hairdryer or heat gun to help the Film conform to curves

- A bit of patience
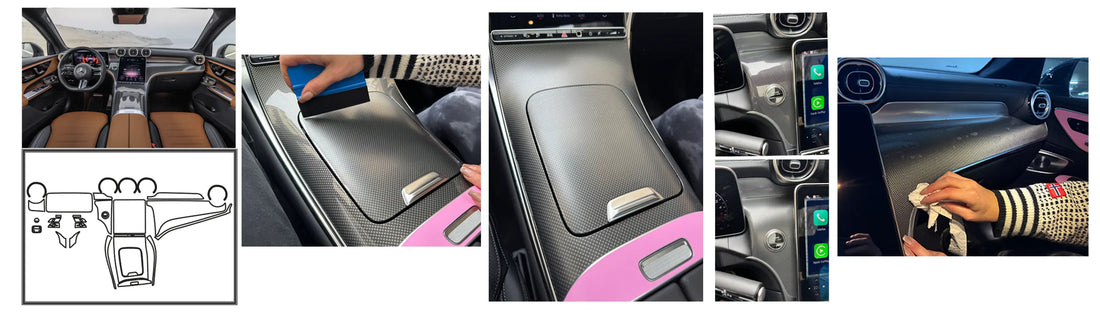
How to Install
- Clean the surface thoroughly – remove all dust and grease.
-
Spray slip solution on the area and on the adhesive side of the Film.
⚠️ Be careful not to use too much liquid, especially near electronic parts.
💡 Pro Tip: Don’t add too much soap — on glossy piano surfaces it takes longer to evaporate and adhere. - Position the Film gently on the surface – it should slide easily.
- Align carefully with edges and corners.
- Squeegee out the liquid from the center outward using firm, even pressure.
- Inspect for bubbles or streaks – lift and re-spray if needed.
- Let it dry for 24 hours before heavy use.
💡 Install in a dust-free environment with good lighting. Patience will reward you with a perfect, invisible finish.
⚠️ Note: After installation, some Films may show temporary white or cloudy areas. These will evaporate within a few hours or days, depending on your climate.

Final Thoughts
Interior PPF is one of the easiest and most rewarding upgrades you can make to your car. It protects the most visible interior parts - dashboard, center console, and trims - from everyday wear while preserving that factory-new look.
Every kit we produce is precisely pre-cut for your car model using professional-grade materials for a perfect fit.
💬 Contact us via Live Chat with your car model link and desired Film type - we’ll send you a custom preview and help you through the process.
Protect your car’s interior today - because every detail matters.